
Tomcat转SpringBoot、tomcat升级到springboot、springmvc改造springboot
起因:我接手tomcat-springmvc-hibernate项目,使用tomcat时问题不大。自从信创开始,部分市场使用国产中间件,例如第一次听说的宝兰德、东方通,还有一些市场使用weblogic、WebSphere;特别是商用中间件,难以满足本地运行并编写部署文档,只能靠市场自行摸搜适配。
那咋办?我直接把tomcat应用直接改造成springboot应用不就完事了,省去了中间件、中间商赚差价、虽然springboot底层用tomcat运行web,但没有了宝兰德、东方通的适配报错。
原项目:tomcat war+spring5+springmvc+hibernate+mysql
改造后:springboot+springbootweb+hibernate+mysql
添加依赖
第一步是添加springboot依赖
<!--	打包类型为jar	-->
<packaging>jar</packaging>
<properties>
  <project.build.sourceEncoding>UTF-8</project.build.sourceEncoding>
  <project.reporting.outputEncoding>UTF-8</project.reporting.outputEncoding>
  <!--	spring的版本应该与springboot内的spring版本一致	-->
  <spring.version>5.3.30</spring.version>
  <springboot.version>2.7.18</springboot.version>
  <hibernate.version>5.6.15.Final</hibernate.version>
</properties>

<dependencies>
  <!-- https://mvnrepository.com/artifact/org.springframework.boot/spring-boot-starter-web -->
  <dependency>
    <groupId>org.springframework.boot</groupId>
    <artifactId>spring-boot</artifactId>
    <version>${springboot.version}</version>
  </dependency>
  <dependency>
    <groupId>org.springframework.boot</groupId>
    <artifactId>spring-boot-starter-web</artifactId>
    <version>${springboot.version}</version>
  </dependency>
  <!-- https://mvnrepository.com/artifact/org.springframework.boot/spring-boot-starter-freemarker -->
  <dependency>
    <groupId>org.springframework.boot</groupId>
    <artifactId>spring-boot-starter-freemarker</artifactId>
    <version>${springboot.version}</version>
  </dependency>

  // 项目其他依赖
</dependencies>


<plugin>
  <groupId>org.springframework.boot</groupId>
  <artifactId>spring-boot-maven-plugin</artifactId>
  <version>${springboot.version}</version>
  <configuration>
    <excludes>
      <exclude>
        <groupId>org.projectlombok</groupId>
        <artifactId>lombok</artifactId>
      </exclude>
    </excludes>
    <mainClass>app.MyApplication</mainClass>
  </configuration>
</plugin>
原来是spring5.3.x,对应springboot2.7.x
转化web.xml
1、编写一个MyApplication
@SpringBootApplication(
        exclude = {
                RedisAutoConfiguration.class, SpringDataWebAutoConfiguration.class
        },
        scanBasePackages = {"app", "cn.com.xxxxx"}
)
@ImportResource({"classpath:spring.xml", "classpath:spring-ds.xml", "classpath:spring-validator.xml"})
@Slf4j
public class MyApplication {
    public static void main(String[] args) {
        ConfigurableApplicationContext context = SpringApplication.run(MyApplication.class, args);
        String port = context.getEnvironment().getProperty("server.port");
        if (port==null)
            port="8080";
        log.info("web: {}", "http://localhost:" +port);
    }
}
特别注意,使用 @ImportResource 导入原有的xml配置还有包扫描路径 scanBasePackagesMyApplication 所放的位置有讲究,通常放到包的根目录下
2、创建一个 src/main/resources/application.properties
spring.main.allow-bean-definition-overriding=true
spring.main.allow-circular-references=true
spring.jpa.open-in-view=false
server.servlet.context-path=/app
允许bean循序、bean重写、web访问上下文路径
3、将web.xml中的 filter/Listener转化为bean
//使用RegistrationBean方式注入Listener
    @Bean
    public ServletListenerRegistrationBean servletListenerRegistrationBean() {
        AppSessionListener myListener = new AppSessionListener();//创建原生的Listener对象
        return new ServletListenerRegistrationBean(myListener);
    }

    //使用RegistrationBean方式注入Listener
    @Bean
    public ServletListenerRegistrationBean servletListenerRegistrationBean2() {
        AppServletContextListener myListener = new AppServletContextListener();//创建原生的Listener对象
        return new ServletListenerRegistrationBean(myListener);
    }
其他的就不多赘述
静态文件转发
tomcat应用的静态文件通常放在app/WebContent下
例如app/WebContent/js/app.js,我们需要将它挂载到静态路径下:
/**
 * @author lingkang
 * created by 2023/12/8
 */
@Slf4j
@Configuration
public class StaticSourceConfig implements WebMvcConfigurer {
    /**
     * 部署本地资源到url
     *
     * @param registry
     */
    @Override
    public void addResourceHandlers(ResourceHandlerRegistry registry) {
        File file = new File(System.getProperty("user.dir") + File.separator + "WebContent");
        String path = file.getAbsolutePath();
        if (!path.endsWith("/"))
            path=path+File.separator;
        log.info("静态文件映射路径:{}", path);
        registry.addResourceHandler("/**")
                .addResourceLocations("file:" + path);
    }
}
打包
基于上面的,基本告一段落了,在没有移动前端资源的情况,同时我们的老项目有那么多xml配置,不可能将它打包到jar里,否则不符合修改迁移。这时候就要用到maven-assembly-plugin插件了,pom.xml配置如下:
<plugin>
  <groupId>org.apache.maven.plugins</groupId>
  <artifactId>maven-compiler-plugin</artifactId>
  <version>3.5.1</version>
  <configuration>
    <source>1.8</source>
    <target>1.8</target>
    <encoding>UTF-8</encoding>
    <compilerArgs>
      <arg>-parameters</arg>
      <arg>-extdirs</arg>
      <arg>${project.basedir}/WebContent/WEB-INF/lib</arg>
    </compilerArgs>
  </configuration>
</plugin>
<plugin>
  <groupId>org.apache.maven.plugins</groupId>
  <artifactId>maven-assembly-plugin</artifactId>
  <version>3.6.0</version>
  <configuration>
    <appendAssemblyId>false</appendAssemblyId>
    <descriptorRefs>
      <descriptorRef>jar-with-dependencies</descriptorRef>
    </descriptorRefs>
    <archive>
      <!-- 此处,要改成自己的程序入口(即 main 函数类) -->
      <manifest>
        <mainClass>app.MyApplication</mainClass>
      </manifest>
    </archive>
    <descriptors>
      <!--assembly配置文件路径,注意需要在项目中新建文件package.xml-->
      <descriptor>${project.basedir}/src/main/resources/package/package.xml</descriptor>
    </descriptors>
  </configuration>
  <executions>
    <execution>
      <id>make-assembly</id>
      <phase>package</phase>
      <goals>
        <goal>single</goal>
      </goals>
    </execution>
  </executions>
</plugin>
src/main/resources/package/package.xml配置如下
<?xml version="1.0" encoding="UTF-8"?>
<assembly xmlns="http://maven.apache.org/ASSEMBLY/2.0.0"
          xmlns:xsi="http://www.w3.org/2001/XMLSchema-instance"
          xsi:schemaLocation="http://maven.apache.org/ASSEMBLY/2.0.0 http://maven.apache.org/xsd/assembly-2.0.0.xsd">
    <!--
        assembly 打包配置更多配置可参考官方文档:
            http://maven.apache.org/plugins/maven-assembly-plugin/assembly.html
     -->
    <id>release</id>

    <!--
        设置打包格式,可同时设置多种格式,常用格式有:dir、zip、tar、tar.gz
            dir 格式便于在本地测试打包结果
            zip 格式便于 windows 系统下解压运行
            tar、tar.gz 格式便于 linux 系统下解压运行
     -->
    <formats>
        <format>dir</format>
        <!--<format>zip</format>-->
        <!-- <format>tar.gz</format> -->
    </formats>

    <!-- 打 zip 设置为 true 时,会在 zip 包中生成一个根目录,打 dir 时设置为 false 少层目录 -->
    <!--<includeBaseDirectory>true</includeBaseDirectory>-->

    <fileSets>
        <!-- src/main/resources 全部 copy 到 config 目录下 -->
        <fileSet>
            <directory>${basedir}/src/main/resources</directory>
            <outputDirectory>config</outputDirectory>
            <includes>
                <!--包含那些依赖-->
            </includes>
        </fileSet>

        <!-- 项目根下面的脚本文件 copy 到根目录下 -->
        <fileSet>
            <directory>${basedir}/src/main/resources/package</directory>
            <outputDirectory></outputDirectory>
            <!-- 脚本文件在 linux 下的权限设为 755,无需 chmod 可直接运行 -->
            <fileMode>755</fileMode>
            <lineEnding>unix</lineEnding>
            <includes>
                <include>*.sh</include>
            </includes>
        </fileSet>

        <fileSet>
            <directory>${basedir}/WebContent/WEB-INF/lib</directory>
            <outputDirectory>lib</outputDirectory>
            <includes>
                <!--包含那些依赖-->
                <include>*.jar</include>
            </includes>
        </fileSet>
        <!-- 静态资源 awb.operations.config.StaticSourceConfig -->
        <fileSet>
            <directory>${basedir}/WebContent</directory>
            <outputDirectory>WebContent</outputDirectory>
            <includes>
                <!--包含那些依赖-->
                <include>compressor/**</include>
                <include>conf/**</include>
                <include>dependence/**</include>
                <include>elementui/**</include>
                <include>fonts/**</include>
                <include>icons/**</include>
                <include>image/**</include>
                <include>img/**</include>
                <include>module/**</include>
                <include>nodejs/**</include>
                <include>script/**</include>
                <include>*.js</include>
                <include>*.html</include>
                <include>*.css</include>
                <include>*.json</include>
            </includes>
        </fileSet>


    </fileSets>

    <!-- 依赖的 jar 包 copy 到 lib 目录下 -->
    <dependencySets>
        <dependencySet>
            <outputDirectory>lib</outputDirectory>
        </dependencySet>
    </dependencySets>

</assembly>
/src/main/resources/package/start.sh运行内容如下
#!/bin/bash
# ----------------------------------------------------------------------
#
# 使用说明:
# 1: 该脚本使用前需要首先修改 MAIN_CLASS 值,使其指向实际的启动类
#
# 2:使用命令行 ./start.sh start | stop | restart 可启动/关闭/重启项目
#
#
# 3: JAVA_OPTS 可传入标准的 java 命令行参数,例如 -Xms256m -Xmx1024m 这类常用参数
#
# 4: 函数 start() 给出了 4 种启动项目的命令行,根据注释中的提示自行选择合适的方式
#
# ----------------------------------------------------------------------

# 启动入口类,该脚本文件用于别的项目时要改这里
MAIN_CLASS=app.MyApplication

if [[ "$MAIN_CLASS" == "app.MyApplication" ]]; then
    echo "请先修改 MAIN_CLASS 的值为你自己项目启动Class,然后再执行此脚本。"
	exit 0
fi

COMMAND="$1"

if [[ "$COMMAND" != "start" ]] && [[ "$COMMAND" != "stop" ]] && [[ "$COMMAND" != "restart" ]]; then
#	echo "Usage: $0 start | stop | restart , 例如: sh start.sh start / sh start.sh stop"
#	exit 0
COMMAND="start"
fi


# Java 命令行参数,根据需要开启下面的配置,改成自己需要的,注意等号前后不能有空格
JAVA_OPTS="-Xms512m -Xmx2048m "
# JAVA_OPTS="-Dserver.port=80 "

# 生成 class path 值
APP_BASE_PATH=$(cd `dirname $0`; pwd)
CP=${APP_BASE_PATH}/config:${APP_BASE_PATH}/lib/*

function start()
{
    # 运行为后台进程,并在控制台输出信息
    #java -Xverify:none ${JAVA_OPTS} -cp ${CP} ${MAIN_CLASS} &

    # 运行为后台进程,并且不在控制台输出信息
    # nohup java -Xverify:none ${JAVA_OPTS} -cp ${CP} ${MAIN_CLASS} >/dev/null 2>&1 &

    # 运行为后台进程,并且将信息输出到 output.out 文件
    nohup java -Xverify:none ${JAVA_OPTS} -cp ${CP} ${MAIN_CLASS} > nohup.out &

    # 运行为非后台进程,多用于开发阶段,快捷键 ctrl + c 可停止服务
    # java -Xverify:none ${JAVA_OPTS} -cp ${CP} ${MAIN_CLASS}
}

function stop()
{
    # 支持集群部署
    kill `pgrep -f ${APP_BASE_PATH}` 2>/dev/null

    # kill 命令不使用 -9 参数时,会回调 onStop() 方法,确定不需要此回调建议使用 -9 参数
    # kill `pgrep -f ${MAIN_CLASS}` 2>/dev/null

    # 以下代码与上述代码等价
    # kill $(pgrep -f ${MAIN_CLASS}) 2>/dev/null
}

if [[ "$COMMAND" == "start" ]]; then
	start
elif [[ "$COMMAND" == "stop" ]]; then
    stop
else
    stop
    start
fi
这时候就能执行打包了:
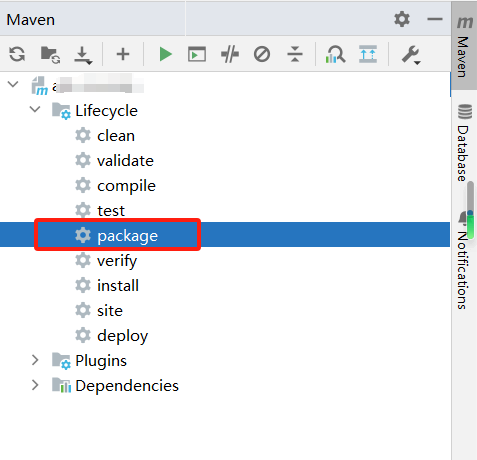
或者
mvn package
效果如下
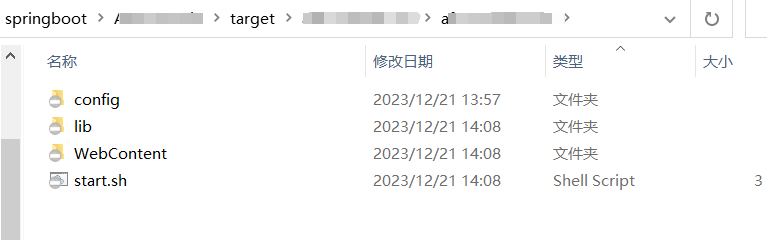
然后将整个路面打包成zip传到服务器运行即可